Coffee Brewing Methods
Discover Different Coffee Brewing Methods for Your Perfect Cup
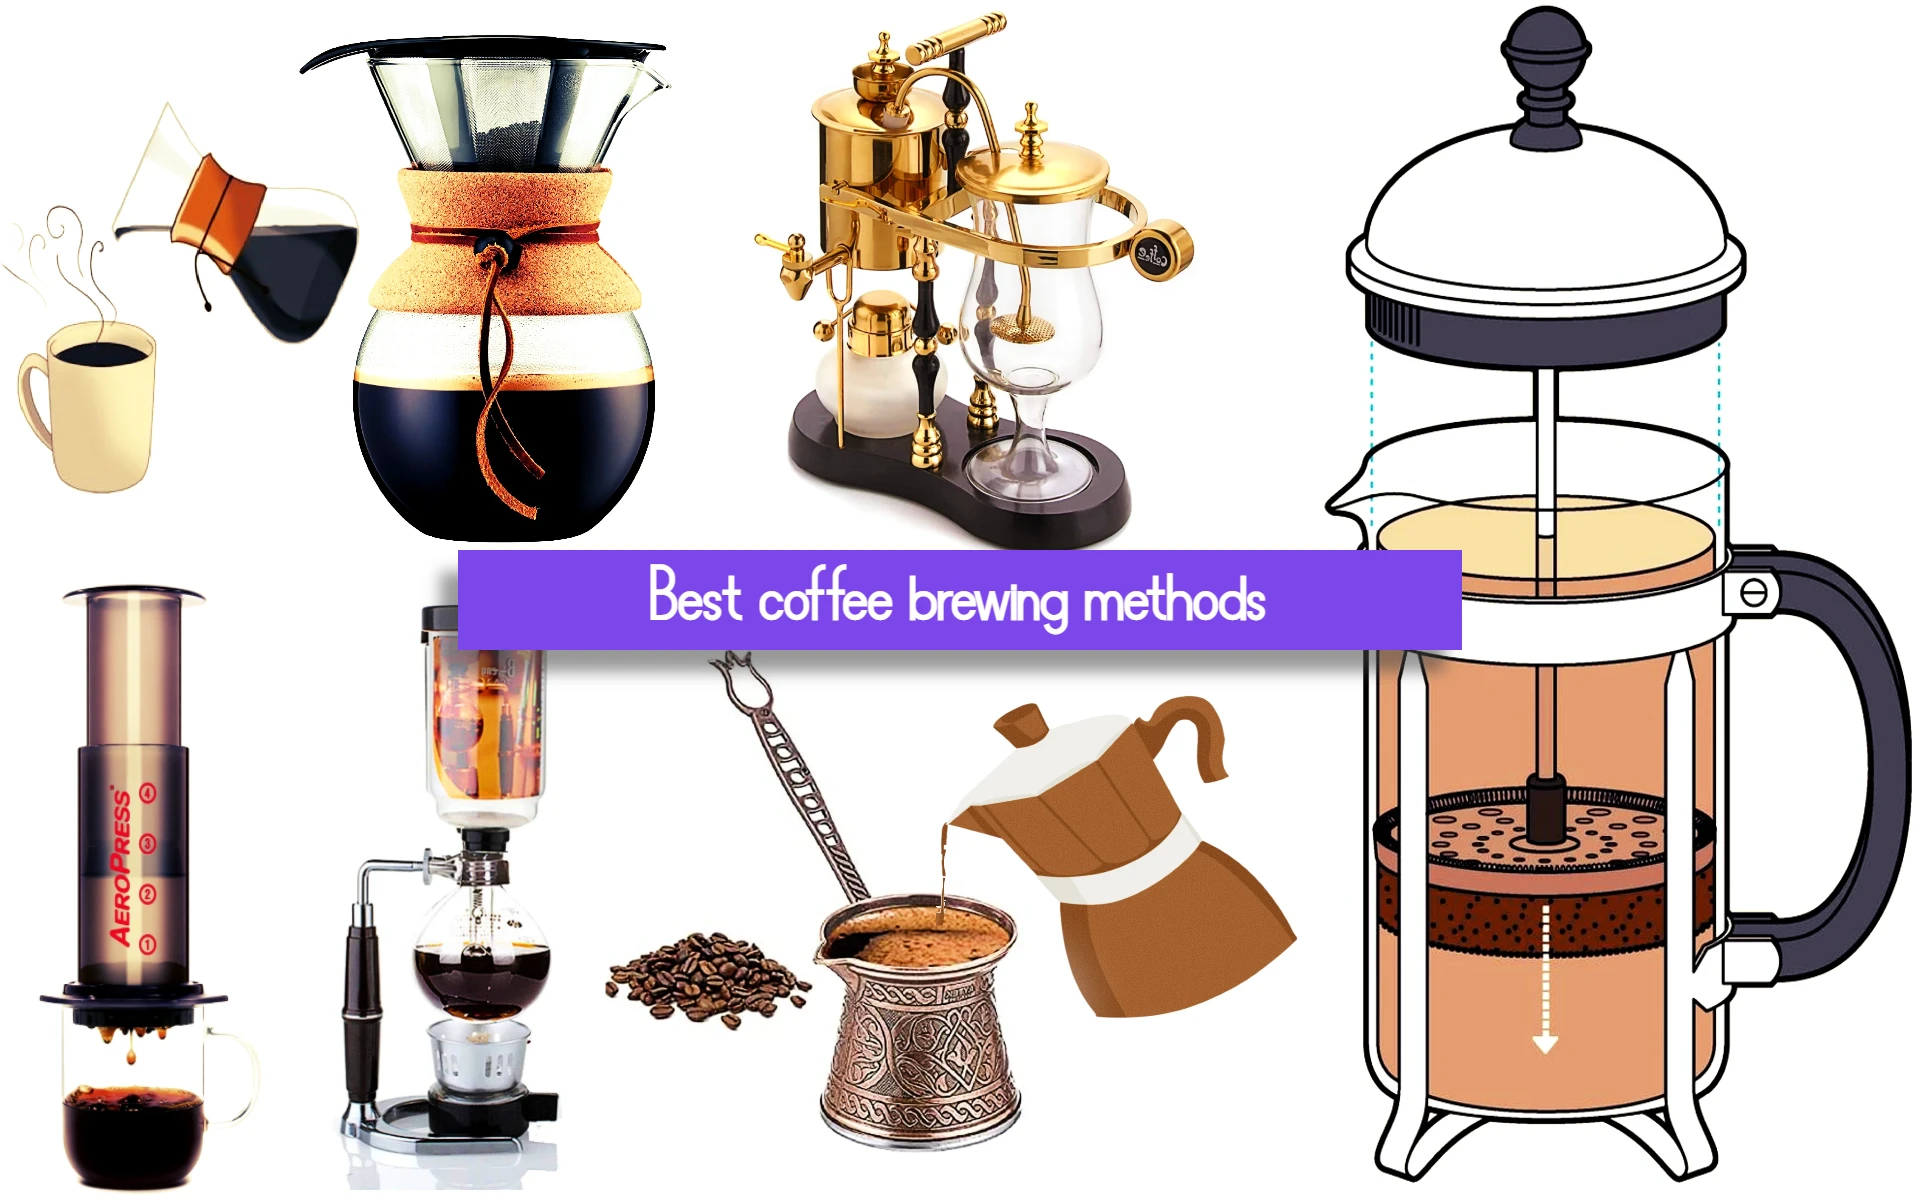
Whether you’re a casual coffee lover or a dedicated connoisseur, understanding different brewing techniques is essential to unlocking the full potential of your favorite beans. In this comprehensive guide, we’ll take you on a journey through the diverse landscape of coffee brewing methods, from classic favorites to innovative approaches. Get ready to delve into the nuances of pour-over, French press, AeroPress, Moka pot, and more. Each method has its unique characteristics, strengths, and considerations, and we’ll explore them all to help you brew your perfect cup of coffee.
If you’re seeking a clean and crisp flavor with delicate nuances, the pour-over method might be your go-to choice. This meticulous technique involves pouring hot water over coffee grounds in a controlled, circular motion, allowing the water to extract the flavors gradually. On the other hand, if you desire a rich and full-bodied brew with a robust taste, the French press might be the perfect fit. Its immersion-style brewing, coupled with a metal mesh filter, captures the coffee’s natural oils and fine particles, resulting in a full-bodied and aromatic cup. Looking for a convenient and versatile option? The AeroPress offers quick brewing and experimentation possibilities, allowing you to enjoy a range of coffee styles, from espresso-like shots to Americano-style blends.
Now that we’ve introduced you to just a taste of what awaits in this coffee brewing methods guide, it’s time for you to dive in and explore the world of coffee brewing. Whether you’re a beginner or a seasoned home barista, this guide will provide insights, tips, and comparisons to help you discover your brewing bliss. So grab your favorite mug, prepare your taste buds, and join us on this coffee-filled adventure. Let’s brew, savor, and elevate our coffee experiences together!
Here’s a comparison table outlining some of the key features and characteristics of 37 popular coffee brewing methods:
| Brewing Method | Flavor Profile | Brew Time | Brew Capacity | Ease of Use | Cleanup |
|---|---|---|---|---|---|
| French Press | Rich, full-bodied | 4-5 minutes | Multiple cups | Moderate | Moderate |
| Chemex | Clean, crisp, nuanced | 4-6 minutes | Multiple cups | Moderate | Moderate |
| Pour-Over | Clean, crisp, nuanced | 3-4 minutes | Single cup | Easy | Easy |
| AeroPress | Versatile, clean | 1-2 minutes | Single cup | Easy | Easy |
| Moka Pot | Strong, bold | 5-7 minutes | Single cup to multiple cups | Moderate | Moderate |
| Siphon | Clean, bright, complex | 3-5 minutes | Multiple cups | Moderate | Moderate |
| Cold Brew | Smooth, low acidity | 12-24 hours | Concentrate or large batch | Easy | Moderate |
| Turkish Coffee | Rich, bold, strong | 5-7 minutes | Single cup | Moderate | Moderate |
| Vacuum Pot | Clean, delicate | 5-10 minutes | Multiple cups | Moderate | Moderate |
| Espresso | Rich, concentrated | 20-30 seconds | Single or double shot | Advanced | Moderate |
| Boiled Coffee | Strong, bold | 5-10 minutes | Multiple cups | Easy | Easy |
| Sous Vide | Smooth, full-bodied | Varies | Single cup | Advanced | Easy |
| Stovetop Espresso Maker | Strong, bold | 5-10 minutes | Single cup to multiple cups | Moderate | Moderate |
| Cowboy Coffee | Strong, robust | 4-6 minutes | Single cup to multiple cups | Easy | Easy |
| Coffee Bags | Convenient, on-the-go | 3-4 minutes | Single cup | Easy | Easy |
| Instant Coffee | Quick, convenient | Instant | Single cup | Very Easy | Very Easy |
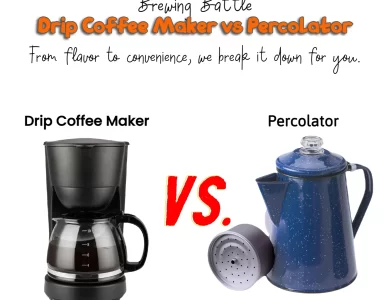
| Percolator | Strong, traditional | 5-10 minutes | Multiple cups | Moderate | Moderate |
| Auto-Drip Coffee Maker | Balanced, consistent | 5-7 minutes | Multiple cups | Easy | Easy |
| Clever Dripper | Full-bodied, clean | 3-4 minutes | Single cup | Easy | Easy |
| K-cups/Single-Serve Coffee Pod | Convenient, customizable | Varies | Single cup | Very Easy | Very Easy |
| Nitrous Coffee | Smooth, velvety | 1-2 minutes | Single cup | Easy | Easy |
| Vietnamese Phin | Bold, rich, sweet | 4-6 minutes | Single cup | Moderate | Moderate |
| Café con Leche | Creamy, balanced | 5-7 minutes | Single or multiple cups | Easy | Easy |
| Pourover Cone | Clean, crisp, nuanced | 3-4 minutes | Single cup | Easy | Easy |
| Manual Espresso Machine | Rich, customizable | Varies | Single or double shot | Brewing Method | Flavor Profile |
| Bean-to-Cup Coffee Machine | Versatile, customizable | Varies | Single or multiple cups | Easy | Moderate |
| Capsule Coffee Machine | Convenient, consistent | Varies | Single cup | Very Easy | Very Easy |
| Lever Espresso Machine | Precise, full control | Varies | Single or double shot | Advanced | Moderate |
| Hario V60 Dripper | Clean, crisp, nuanced | 3-4 minutes | Single cup | Easy | Easy |
| Kalita Wave | Balanced, even extraction | 4-5 minutes | Single or multiple cups | Easy | Easy |
| Hario V60 | Clean, crisp, nuanced | 3-4 minutes | Single cup | Easy | Easy |
| Iced Coffee Pitcher Method | Smooth, refreshing | Overnight | Large batch | Easy | Easy |
| Wilfa Precision Automatic Brewer | Consistent, customizable | 4-6 minutes | Multiple cups | Easy | Easy |
| Yama Glass Tower Cold Drip | Smooth, low acidity | 3-4 hours | Concentrate or large batch | Advanced | Moderate |
| Bunn Trifecta | Clean, customizable | 4-6 minutes | Single cup | Advanced | Moderate |
| Toddy Cold Brew System | Smooth, low acidity | 12-24 hours | Concentrate or large batch | Easy | Easy |
| Filtron Cold Water Coffee Concentrate Brewer | Smooth, low acidity | 12-24 hours | Concentrate or large batch | Easy | Easy |
Type of Brewing Methods
Coffee brewing refers to the process of extracting the flavors and aromas from ground coffee beans using water. There are many different methods for brewing coffee, each of which produces a unique flavor and strength. Some common brewing methods include:
- Drip brewing: Drip brewing involves brewing coffee by dripping hot water through ground coffee beans and into a carafe or mug. It is a common method used in coffee makers and can be done using a variety of brewing devices, such as a pour-over cone, a Chemex, or a coffee maker.
- Immersion brewing: Immersion brewing involves steeping ground coffee beans in water for a period of time to extract the flavors. Some examples of immersion brewing methods include the French press and the cold brew.
- Pressure brewing: Pressure brewing refers to a brewing method where coffee is made by using pressure to extract the flavors from ground coffee beans. Some examples of pressure brewing methods include espresso, Moka pots, and AeroPress.
- Boiling: Boiling coffee refers to a brewing method where ground coffee beans are boiled in water to extract their flavors. Examples of boiling methods include Turkish coffee and boiled coffee.
- Steeping: Steeping coffee refers to a brewing method where ground coffee beans are soaked in water to extract their flavors. Examples of steeping methods include the French press, cold brew, and sous vide.
The brewing method you choose will depend on your personal preference and the type of coffee you want to make. Different brewing methods can produce a wide range of flavors, from light and bright to bold and full-bodied.
Top 37 Best Coffee Brewing Methods
There are many different methods for brewing coffee, and the best one for you will depend on your personal taste and preferences. There are a few factors to consider when choosing the best brewing method for you:
- Taste: Different brewing methods can produce coffee with different flavors, so consider your personal taste preferences when selecting a method. For example, espresso has a strong, bold flavor, while drip coffee is generally milder.
- Convenience: Consider how much time and effort you are willing to put into brewing your coffee. Some methods, like drip brewing, are quick and easy, while others, like the French press, require a bit more effort.
- Cost: The cost of different brewing methods can vary significantly. Simple drip coffee makers are generally inexpensive, while more advanced machines like espresso makers can be quite expensive.
- Equipment: Make sure you have the necessary equipment for the brewing method you choose. For example, if you want to make espresso, you will need an espresso machine.
- Skill level: Some brewing methods, like espresso, require a high level of skill and practice to master. If you are just starting out with coffee brewing, you may want to choose a method that is easier to learn.
Ultimately, the best brewing method for you will depend on your personal preferences and needs. Experimenting with different methods can help you find the one that works best for you.

#1. French Press Brewing
Are you a coffee lover looking for a brewing method that brings out the full-bodied flavors of your favorite beans? If so, you might want to consider the French press brewing method. The French press, also known as a cafetière or coffee press, is a simple and classic method for brewing coffee. It consists of a cylindrical glass or stainless steel pot with a plunger and a metal or nylon mesh filter. To brew coffee using a French press, you will need coarsely ground coffee beans, hot water, and a heat source. In this Section, we’ll explore the pros and cons of using a French press to help you decide if it’s the right choice for you.
Pros of French Press Brewing
- Fuller Flavor: One of the biggest advantages of the French press method is the rich and robust flavor it produces. The metal mesh filter allows the natural oils and fine particles from the coffee beans to pass through into the final brew. This results in a full-bodied and aromatic cup of coffee that captures the essence of the beans.
- Control over Brewing Parameters: With a French press, you have complete control over the brewing parameters such as water temperature, steeping time, and coffee-to-water ratio. This allows you to customize your brewing process according to your preferences and experiment with different variables to find the perfect balance of flavors.
- No Paper Filters: Unlike other brewing methods that require disposable paper filters, the French press uses a metal mesh filter that can be reused indefinitely. This not only saves you money in the long run but also reduces waste, making it an environmentally-friendly choice.
- Simple and Easy to Use: Using a French press is straightforward and doesn’t require any specialized skills or equipment. All you need is coarsely ground coffee, hot water, and a French press. Simply add the coffee grounds, pour in hot water, let it steep, and then press the plunger down to separate the grounds from the brewed coffee.
- Versatility: The French press is not limited to brewing coffee; it can also be used to make tea, herbal infusions, and cold brews. This versatility makes it a valuable addition to your kitchen, allowing you to experiment with different beverages and expand your brewing repertoire.
- Portable and Durable: French presses are typically made of stainless steel or glass, making them durable and resistant to breakage. They are also compact and lightweight, making them ideal for traveling, camping, or any situation where you want to enjoy a freshly brewed cup of coffee on the go.
Cons of French Press Brewing
- Sediment in the Cup: One of the main drawbacks of the French press brewing method is the presence of sediment in the final cup of coffee. Since the metal mesh filter doesn’t trap all the fine particles, some sediment may find its way into your drink. While some coffee lovers enjoy the added texture and body, others may find it unpleasant.
- Requires Coarse Grind: To prevent excessive sediment in the coffee, a coarse grind is recommended when using a French press. However, this can be a disadvantage for those who prefer a finer grind, as the French press may not produce the desired level of extraction. The coarser grind also affects the extraction time, requiring a longer steeping period to achieve optimal flavor.
- Limited Brew Capacity: French presses come in various sizes, but the largest ones typically have a capacity of around 32 ounces (946 ml). If you frequently brew coffee for a larger group of people or have multiple servings throughout the day, you may find the limited brew capacity of the French press inconvenient.
- Requires Manual Effort: The process of using a French press involves a manual effort to press the plunger down and separate the coffee grounds from the brewed coffee. While this may not be a significant issue for most people, it could be a disadvantage for those with physical limitations or conditions that make it difficult to exert pressure.
- Steeping Time: Compared to other brewing methods such as pour-over or drip coffee, the French press has a longer steeping time. This extended contact between the coffee grounds and water can result in over-extraction if not carefully monitored. It’s essential to find the right steeping time for your preferred taste to avoid bitterness or a weaker brew.
- Temperature Control: Achieving and maintaining the proper water temperature is crucial for brewing a great cup of coffee. With a French press, it can be challenging to control the water temperature throughout the entire brewing process. If the water is too hot, it can lead to over-extraction, while water that’s not hot enough may result in under-extraction.
- Cleaning and Maintenance: While French presses are relatively easy to use, they do require regular cleaning and maintenance to keep them in optimal condition. The metal mesh filter needs to be thoroughly cleaned to prevent residue buildup, and the glass or stainless steel body should be cleaned and dried properly to avoid any lingering odors or stains.
To summarize, the French press brewing method offers a range of benefits, including a fuller flavor, control over brewing parameters, and simplicity and versatility. However, it does have some drawbacks, such as sediment in the cup, the need for a coarse grind, limited brew capacity, and the manual effort required. Additionally, the longer steeping time, temperature control, and cleaning and maintenance may pose challenges for some users.
If you’re someone who values a rich and aromatic cup of coffee and enjoys experimenting with different brewing variables, the French press could be an excellent choice for you. On the other hand, if you prefer a cleaner cup of coffee with less sediment or require a larger brew capacity, you might want to explore alternative brewing methods.
Here is a step-by-step guide to brewing coffee using a French press:
- Heat water: Bring a pot of water to a boil and let it cool for a minute or two until it reaches a temperature of around 200°F.
- Grind the beans: Coarsely grind enough beans to fill the French press. A general rule of thumb is to use about 1 ounce (28 grams) of coffee beans for every 16 ounces (450 milliliters) of water.
- Add the beans to the press: Place the ground coffee beans in the bottom of the French press.
- Add the water: Pour the heated water over the coffee beans, making sure to wet all of the grounds.
- Steep the coffee: Allow the coffee to steep for about four minutes.
- Press the plunger: Slowly press the plunger down, separating the brewed coffee from the coffee grounds.
- Pour and enjoy: Pour the brewed coffee into your mug and enjoy!
Keep in mind that the exact brewing time and temperature may vary depending on your personal preferences and the type of French press you are using. Experimenting with different brewing times and temperatures can help you find the perfect brew for your taste.

#2. Chemex Brewing
If you’re a coffee enthusiast seeking a brewing method that combines elegance with exceptional taste, the Chemex brewing method might be just what you’re looking for. Chemex is a pour-over style of coffee brewing method that uses a cone-shaped filter made of bonded paper. The Chemex consists of a glass hourglass-shaped flask with a wooden collar and tie. To brew coffee with the Chemex, you’ll need coarsely ground coffee beans and hot water.
Pros of Chemex Brewing
- Clean and Crisp Flavor: One of the key advantages of the Chemex brewing method is the clean and crisp flavor it produces. The Chemex’s thick paper filter effectively removes oils, sediments, and bitter compounds, resulting in a smooth and well-balanced cup of coffee. This brewing technique highlights the intricate flavor profiles of specialty coffees, allowing you to fully appreciate their nuances.
- Visual Appeal: The iconic hourglass shape of the Chemex, made from high-quality glass, adds a touch of elegance to your coffee brewing experience. The transparency of the glass allows you to observe the brewing process, from the blooming of the coffee grounds to the steady flow of the extracted coffee. It’s a visually pleasing method that can be a delight to watch and share with others.
- Customizable Brewing Parameters: With Chemex, you have control over various brewing parameters, including water temperature, grind size, and coffee-to-water ratio. This flexibility allows you to tailor your brewing process to achieve your preferred flavor profile. You can experiment with different variables to find the right balance and create a cup of coffee that suits your taste preferences.
- Brewing Capacity: The Chemex is available in various sizes, ranging from 3-cup to 10-cup models, allowing you to brew coffee for yourself or a group of people. Whether you’re enjoying a quiet morning coffee or hosting a gathering, the Chemex offers versatility in terms of brewing capacity.
- Simplicity of Use: Using a Chemex is relatively simple and doesn’t require any complex techniques or equipment. Once you’ve selected your preferred coffee beans, grind them to the appropriate size, place the filter in the Chemex, add the coffee grounds, and slowly pour hot water over them in a circular motion. The coffee then drips through the filter, collecting in the bottom chamber, ready for you to serve and savor.
- Environmentally Friendly: Chemex filters are made of bonded paper and are biodegradable. This means that you can dispose of them along with your organic waste, reducing the environmental impact compared to methods that rely on single-use plastic or metal filters.
Cons of Chemex Brewing
- Requires Skill and Precision: While the Chemex brewing method is not overly complicated, it does require a certain level of skill and precision to achieve optimal results. Factors such as pouring technique, water temperature, and grind size can significantly impact the flavor profile of the final cup. It may take some practice and experimentation to master the art of brewing with a Chemex.
- Longer Brew Time: Compared to other brewing methods like a French press or pour-over, the Chemex brewing process can take a bit longer. The thick paper filter used in a Chemex slows down the extraction process, resulting in a longer brew time. If you’re someone who values efficiency or is often in a hurry, this may be a drawback.
- Paper Filter Dependency: While the paper filters used in a Chemex contribute to its clean flavor, they also require ongoing purchase and use. This can be a recurring cost and may not be ideal for those seeking a more cost-effective or sustainable brewing method. However, it’s worth noting that the Chemex filters are reasonably priced and widely available.
- Fragility: The Chemex is made of delicate glass, making it susceptible to breakage if mishandled or accidentally dropped. This fragility requires careful handling and storage to ensure its longevity. Additionally, the glass body may be more challenging to clean and maintain compared to other brewing devices made of stainless steel or plastic.
- Limited Versatility: While the Chemex is primarily designed for brewing coffee, it doesn’t offer the same versatility as other methods like the French press or espresso machine. The Chemex is specifically optimized for pour-over brewing, and while it can produce exceptional coffee, it may not be the ideal choice if you desire to experiment with different brewing styles or beverages.
- Difficulty in Consistency: Achieving consistency with the Chemex brewing method can be a challenge, especially when brewing multiple cups or trying to recreate the same flavor profile consistently. Factors such as pour rate, water distribution, and even filter placement can impact the results. It may take some practice and attention to detail to achieve consistent brewing outcomes.
To summarize, the Chemex brewing method offers a range of benefits, including clean and crisp flavors, visual appeal, customizable brewing parameters, and brewing capacity options. However, it does have some drawbacks, such as the need for skill and precision, longer brew time, paper filter dependency, fragility, limited versatility, and difficulty in consistency.
If you appreciate the aesthetics of the brewing process, enjoy the clean and nuanced flavors of specialty coffee, and are willing to invest time and effort into perfecting your brewing technique, the Chemex could be a fantastic choice for you. However, if you prioritize speed, and convenience, or are seeking a more versatile brewing method, you may want to explore other options.
Here’s the basic process for brewing coffee with Chemex:
- Boil water and let it cool slightly (to around 200°F).
- Place a Chemex filter in the cone-shaped portion of the Chemex, making sure it covers the spout and folds neatly along the top rim.
- Wet the filter with a small amount of hot water to rinse it and remove any paper taste.
- Add ground coffee to the filter. The general ratio is about 55 grams of coffee per 800 mL of water, but you can adjust this to your personal taste.
- Slowly pour a small amount of hot water over the grounds, making sure to wet them evenly. This is called the “bloom.”
- Wait about 30 seconds for the bloom to subside.
- Continue pouring hot water in a circular motion, making sure to pour over all the grounds.
- When all the water has been added, remove the filter and dispose of it.
- Pour the brewed coffee into a carafe or mug and enjoy!
Remember, the ultimate decision on the brewing method rests on your personal preferences, lifestyle, and the experience you seek. Whichever method you choose, the joy of brewing and savoring a delicious cup of coffee is what truly matters.

#3. Pour-over
If you’re a coffee enthusiast who appreciates precision and control over every aspect of the brewing process, the pour-over brewing method might be the perfect fit for you. Pour-over brewing is a manual coffee brewing method that involves pouring hot water over ground coffee beans that are contained in a filter. The brewing process is simple, and it allows for a lot of control over the final product. The pour-over method is known for producing a clean and balanced cup of coffee with a clear separation of flavors.
Pros of Pour-Over Brewing
- Enhanced Flavor and Aroma: One of the greatest advantages of the pour-over brewing method is the ability to extract the maximum flavor and aroma from your coffee beans. By slowly and precisely pouring hot water over the coffee grounds, you have complete control over the extraction process. This results in a clean, bright, and flavorful cup of coffee that allows you to fully appreciate the nuances and subtleties of different coffee beans.
- Customizable Brew Parameters: Pour-over brewing gives you the flexibility to adjust various brewing parameters to achieve your desired taste. You can control factors such as water temperature, grind size, pouring technique, and coffee-to-water ratio. This level of customization allows you to experiment and fine-tune your brewing process to create a cup of coffee that perfectly suits your preferences.
- Versatility and Experimentation: The pour-over brewing method opens up a world of possibilities for experimentation. Whether you’re exploring different coffee origins, experimenting with roast levels, or trying out new brewing techniques, pour-over allows you to dive deep into the art of coffee brewing. This method encourages creativity and exploration, making it an exciting option for coffee enthusiasts who love to experiment with their brews.
- Consistency and Precision: With pour-over brewing, you have precise control over the water flow rate and distribution, which can contribute to consistency in your brewing results. This level of control allows you to replicate your preferred cup of coffee consistently, ensuring that each brew is as satisfying as the last.
- Minimal Equipment Requirements: Unlike some other brewing methods that require specialized equipment or machines, pour-over brewing can be done with minimal equipment. All you need is a pour-over dripper, a paper or metal filter, a kettle, and your favorite coffee beans. This simplicity makes pour-over brewing accessible and convenient for home use, travel, or even in the great outdoors.
- Easy Cleanup: Cleaning up after a pour-over brewing session is a breeze. Since the coffee grounds are contained in a filter, all you need to do is dispose of the used filter and rinse the dripper. This simplicity makes pour-over brewing a hassle-free option for those who appreciate a quick and efficient cleanup process.
Cons of Pour-Over Brewing
- Time and Attention: Pour-over brewing can be a time-consuming process that requires careful attention and focus. Achieving optimal results may take some practice and patience, especially when it comes to pouring technique and timing. If you’re someone who values convenience and speed, the pour-over method may not be the best choice for you.
- Skill Development: While pour-over brewing is relatively simple in terms of equipment, it does require a certain level of skill and technique to master. Factors such as the rate and consistency of pouring, the circular motion, and even the grind size can impact the final cup of coffee. It may take time and practice to develop the necessary skills for consistently excellent pour-over brewing.
- Single-Cup Brewing: Pour-over brewing is typically done on a cup-by-cup basis, which may be inconvenient if you need to brew multiple servings or if you’re hosting a gathering. This method is best suited for individuals or small groups who prefer a freshly brewed cup of coffee each time.
- Equipment Dependence: While pour-over brewing doesn’t require specialized equipment, it does rely on having a pour-over dripper and filters readily available. If you run out of filters or misplace your dripper, it can interrupt your brewing routine. It’s important to ensure you have the necessary equipment on hand to continue enjoying pour-over coffee consistently.
- Inconsistent Results with Inconsistent Technique: Pour-over brewing is highly dependent on technique and execution. If your pouring technique or water flow is inconsistent, it can lead to uneven extraction and potentially impact the flavor and quality of your coffee. This method requires attention to detail and precision to achieve optimal results consistently.
- Limited Brew Capacity: Pour-over brewing is typically done on a small scale, making it less suitable for brewing larger quantities of coffee. If you frequently need to brew coffee for a large group or prefer to have multiple servings readily available, a pour-over method may not be the most efficient choice.
To brew coffee using the pour-over method, you’ll need a pour-over dripper, filter paper, ground coffee beans, and hot water. Here’s the basic process:
- Boil water and let it cool slightly (to around 200°F).
- Place a filter in the pour-over dripper and wet the filter with a small amount of hot water to rinse it and remove any paper taste.
- Add ground coffee to the filter. The general ratio is about 55 grams of coffee per 800 mL of water, but you can adjust this to your personal taste.
- Slowly pour a small amount of hot water over the grounds, making sure to wet them evenly. This is called the “bloom.”
- Wait about 30 seconds for the bloom to subside.
- Continue pouring hot water in a circular motion, making sure to pour over all the grounds.
- When all the water has been added, remove the filter and dispose of it.
- Pour the brewed coffee into a carafe or mug and enjoy!
To summarize, pour-over brewing offers numerous benefits, including enhanced flavor and aroma, customizable brewing parameters, versatility for experimentation, consistency and precision, minimal equipment requirements, and easy cleanup. However, it does have some drawbacks, such as the time and attention required, the need for skill development, single-cup brewing limitations, equipment dependence, inconsistent results with inconsistent technique, and limited brew capacity.
If you’re someone who values the process of brewing and enjoys the hands-on approach to extracting the fullest potential from your coffee beans, the pour-over method can be a rewarding and satisfying experience. However, if convenience, speed, or brewing larger quantities are your priorities, you may want to explore alternative brewing methods.

#4. AeroPress
If you’re a coffee lover who values convenience, versatility, and the ability to brew a flavorful cup of coffee quickly, the AeroPress brewing method might be just what you’re looking for. The AeroPress is a manual coffee brewing method that uses a cylindrical plunger to press hot water through coffee grounds. It was invented in 2005 by Alan Adler, a Stanford University professor, and has gained popularity in recent years for its simplicity and versatility.
Pros of AeroPress Brewing
- Quick and Convenient: One of the most significant advantages of the AeroPress brewing method is its speed and convenience. The entire brewing process typically takes just a few minutes, making it ideal for those busy mornings or when you’re on the go. The AeroPress is compact and portable, allowing you to enjoy a freshly brewed cup of coffee wherever you are.
- Full Extraction and Enhanced Flavor: The AeroPress utilizes a combination of immersion and pressure to extract the flavors from your coffee beans efficiently. The result is a rich and full-bodied cup of coffee with enhanced flavors and aromas. The gentle pressure applied during brewing helps extract more oils and compounds from the coffee, contributing to a well-rounded and flavorful brew.
- Versatility and Experimentation: The AeroPress offers incredible versatility, allowing you to experiment with various brewing techniques, grind sizes, and coffee-to-water ratios. This flexibility enables you to customize your brewing process and explore different flavors and brewing styles. Whether you prefer a strong espresso-like shot or a milder and smoother cup, the AeroPress can deliver a wide range of brewing possibilities.
- Easy Cleanup: Cleaning up after using AeroPress is a breeze. Since the brewed coffee is contained within the chamber, all you need to do is eject the coffee puck and rinse the AeroPress. The simplicity of the design and the ability to disassemble the parts make it a hassle-free brewing method when it comes to clean up.
- Travel-Friendly: The AeroPress is lightweight, durable, and easily portable, making it an excellent companion for travel or camping adventures. It doesn’t require electricity or complex equipment, allowing you to brew a delicious cup of coffee wherever your journey takes you. Whether you’re staying at a hotel or enjoying the great outdoors, the AeroPress is a reliable brewing method that ensures you never have to compromise on your coffee enjoyment.
- Affordable and Low Maintenance: AeroPress is an affordable brewing option that delivers excellent results without breaking the bank. The device itself is reasonably priced, and the paper filters used in the AeroPress are cost-effective. Additionally, the AeroPress requires minimal maintenance, and with proper care, it can last for a long time, making it a budget-friendly choice for coffee enthusiasts.
Cons of AeroPress Brewing
- Single-Cup Brewing: AeroPress is primarily designed for brewing single servings of coffee. If you frequently need to brew multiple cups for a group of people or prefer to have larger quantities of coffee readily available, the AeroPress may not be the most efficient option. However, it is possible to brew concentrated coffee with the AeroPress and dilute it to achieve larger quantities.
- Requires Attention to Detail: While AeroPress is relatively straightforward to use, achieving consistent and optimal results may require some attention to detail. Factors such as water temperature, grind size, and brewing time can significantly impact the flavor profile of the coffee. It may take some experimentation and practice to find the right combination of variables that suit your preferences.
- Filtered Brewing Method: AeroPress uses paper or metal filters to separate the brewed coffee from the grounds. While this results in a clean and sediment-free cup of coffee, some coffee enthusiasts may prefer the added texture and body that comes with methods like the French press. Additionally, the use of disposable paper filters generates waste, although metal filters are available as a reusable and more sustainable alternative.
- Limited Pressure Control: While the AeroPress does apply pressure during the brewing process, the level of pressure is not as precise or adjustable as in espresso machines. This means that if you’re specifically seeking the characteristics of an espresso shot, the AeroPress may not be able to replicate the same level of pressure and extraction as a dedicated espresso machine.
- Learning Curve: While AeroPress is generally user-friendly, there is still a learning curve involved in mastering the brewing technique. Finding the right grind size, water temperature, and brewing method that suits your taste preferences may take a bit of trial and error. However, the experimentation process can also be part of the fun and enjoyment of using AeroPress.
- Limited Brew Capacity: AeroPress is primarily designed for brewing single cups of coffee, which may be a disadvantage if you often need to brew larger quantities. While it is possible to brew concentrated coffee and dilute it with hot water to achieve larger servings, it may require additional time and effort.
To use an AeroPress, you will need the following items:
- AeroPress device
- AeroPress paper filters or a reusable metal filter
- Freshly ground coffee beans
- Hot water
- A mug or carafe to brew into
To brew with an AeroPress, follow these steps:
- Place a paper filter at the bottom of the AeroPress. If using a reusable metal filter, skip this step.
- Add freshly ground coffee beans to the AeroPress chamber.
- Pour hot water over the coffee beans.
- Stir the mixture for a few seconds to ensure all the coffee is saturated with water.
- Place the plunger on top of the chamber and gently press down, extracting the coffee into your mug or carafe.
The AeroPress is known for producing a smooth, clean-tasting cup of coffee with low acidity. It is also a relatively quick and easy brewing method, taking only a few minutes to produce a cup of coffee.
To summarize, the AeroPress brewing method offers several advantages, including quick and convenient brewing, full extraction and enhanced flavor, versatility for experimentation, easy cleanup, travel-friendly design, and affordability. However, it also has some limitations, such as its single-cup brewing capacity, the need for attention to detail, the use of filters, limited pressure control, a learning curve, and limited brew capacity for larger servings.
If you’re someone who values convenience, flexibility, and the ability to brew a flavorful cup of coffee quickly, the AeroPress is an excellent choice. Its portability, ease of use, and the ability to customize your brewing process make it a popular option among coffee enthusiasts. However, if you frequently need to brew larger quantities of coffee or prefer a brewing method with more precise pressure control, you may want to consider alternative options.

#5. Moka pot
If you’re a coffee enthusiast who enjoys a strong and robust cup of coffee with a distinctive flavor, the Moka pot brewing method might be just what you’re looking for.
The Moka pot is a type of coffee brewer that is commonly used in Europe and Latin America. It is a stovetop brewer that uses steam pressure to force hot water up through a bed of ground coffee, producing a strong and flavorful cup of coffee. The Moka pot consists of three main parts: a base, a filter basket, and a top chamber. The base of the pot is filled with water, and the filter basket is filled with ground coffee. The top chamber is where the brewed coffee collects. To use any size of Moka pot, you simply place it on the stove over medium heat and wait for the water to boil and produce steam. As the steam pressure builds, it forces the hot water up through the ground coffee and into the top chamber, where it is collected and ready to be served. The Moka pot is a simple and efficient way to brew coffee, and it produces a strong, flavorful cup that is similar to espresso.
Pros of Moka Pot Brewing
- Strong and Bold Flavor: The Moka pot is renowned for producing a strong and bold cup of coffee. The brewing process, which involves pressurized steam passing through the coffee grounds, extracts rich flavors and essential oils, resulting in a concentrated and intense brew. If you prefer a robust coffee with a full-bodied taste, the Moka pot is an excellent choice.
- Versatility of Coffee Types: The Moka pot allows you to brew various types of coffee, including espresso-style shots and Americano-style coffee. Depending on the grind size, coffee-to-water ratio, and brewing time, you can customize the brewing process to achieve different strengths and flavors. This versatility gives you the freedom to experiment and enjoy a range of coffee experiences.
- Ease of Use: Using a Moka pot is relatively simple and doesn’t require any complex techniques or equipment. Fill the bottom chamber with water, add coffee grounds to the filter basket, assemble the pot, and place it on a heat source. As the water heats up, steam pressure builds up, pushing the water through the coffee grounds and into the upper chamber. Once the brewing is complete, pour and savor your flavorful cup of coffee.
- Speed of Brewing: Compared to other brewing methods like pour-over or French press, the Moka pot offers a relatively quick brewing process. Within just a few minutes, you can have a strong and aromatic cup of coffee ready to enjoy. This makes the Moka pot a convenient option for those who are short on time but still crave a flavorful coffee experience.
- Affordability and Durability: Moka pots are generally affordable and offer good value for the price. They are made of durable materials such as aluminum or stainless steel, which ensures their longevity with proper care. Investing in a Moka pot allows you to enjoy its brewing capabilities for an extended period without breaking the bank.
- Suitable for Stovetop Use: The Moka pot is designed for stovetop use, making it a practical brewing method for both indoor and outdoor settings. Whether you have a gas, electric, or induction stovetop, the Moka pot can be easily placed and brewed on it, making it a versatile option for home use, camping trips, or travel.
Cons of Moka Pot Brewing
- Strong and Potentially Bitter Brew: While the strong flavor is often appreciated by coffee lovers, it can be a drawback for those who prefer milder or more balanced flavors. The concentrated nature of the Moka pot brew, combined with the high extraction of oils, can result in a coffee that is stronger and potentially bitter. It may take some experimentation with grind size, coffee-to-water ratio, and brewing time to find the right balance and avoid bitterness.
- Limited Brew Capacity: Moka pots come in different sizes, typically ranging from 1 to 12 cups. However, the actual cup size in a Moka pot is smaller than a standard coffee cup. If you frequently brew coffee for a larger group or prefer multiple servings throughout the day, the limited brew capacity of the Moka pot may be a drawback.
- Requires Attention and Monitoring: The Moka pot requires constant attention during the brewing process. It’s essential to closely monitor the heat source to prevent the coffee from overheating or boiling. If thecoffee boils, it can result in a burnt and unpleasant taste. Additionally, you need to be attentive to the flow of coffee from the spout to prevent any potential splashing or spilling.
- Requires Medium-Fine Grind: To achieve optimal results with a Moka pot, a medium-fine grind size is recommended. However, this can be a disadvantage for those who prefer a coarser grind. Using a coarser grind may result in under-extraction and a weaker brew, while using a finer grind can lead to over-extraction and a potentially bitter taste. Finding the right grind size for your preferred taste may require some experimentation.
- Cleaning and Maintenance: Moka pots require regular cleaning and maintenance to ensure optimal performance and longevity. Disassembling and cleaning the various components, including the filter basket and rubber gasket, is necessary to remove any coffee residue and prevent the buildup of oils that can affect the flavor of future brews. Additionally, the rubber gasket may need to be replaced periodically to maintain a proper seal.
- Heat Source Limitations: The Moka pot relies on a heat source, typically a stovetop, to generate the necessary steam pressure for brewing. This means that if you’re without a stovetop or in an environment where a heat source is not available, using a Moka pot may be challenging. It’s important to consider the availability of a suitable heat source when opting for the Moka pot brewing method.
To use a Moka pot, you will need the following items:
- Freshly roasted, finely ground coffee beans
- Filtered water
- A Moka pot
- A stove or heat source
Here are the steps for brewing coffee using a Moka pot:
- Fill the base of the Moka pot with cold, filtered water. Be sure not to overfill the base, as the water should not come into contact with the bottom of the filter basket.
- Place the filter basket on top of the base, and fill it with finely ground coffee. Tap the side of the Moka pot gently to settle the grounds, but do not tamp them down.
- Place the top chamber of the Moka pot on top of the filter basket, making sure that it is securely in place.
- Place the Moka pot on the stove over medium heat. As the water in the base begins to boil and produce steam, the steam pressure will force the hot water up through the coffee grounds and into the top chamber.
- As the coffee begins to fill the top chamber, it will start to sputter and make a hissing sound. This is normal, and it means that the coffee is almost ready.
- As soon as the top chamber is full of coffee, turn off the heat and carefully remove the Moka pot from the stove. The brewed coffee will be ready to serve.
- Pour the brewed coffee into your mug or cups, and enjoy!
To summarize, the Moka pot brewing method offers several advantages, including a strong and bold flavor, versatility in coffee types, ease of use, speed of brewing, affordability, and suitability for stovetop use. However, it also has some limitations, such as the potential for a strong and bitter brew, limited brew capacity, the need for attention and monitoring, a preference for a medium-fine grind, cleaning and maintenance requirements, and reliance on a heat source.
If you enjoy a strong and robust cup of coffee and value the convenience and versatility of stovetop brewing, the Moka pot is an excellent choice. However, if you prefer milder flavors, require larger brew quantities, or seek a brewing method that doesn’t rely on a heat source, you may want to consider alternative options.

#6. Siphon
Siphon brewing, also known as vacuum brewing, is a method of brewing coffee in which water is heated in a lower chamber and then forced upwards, through a bed of ground coffee, into an upper chamber. The process is driven by vapor pressure, which is created when the water is heated to boiling point. As the vapor pressure increases, it forces the hot water up into the upper chamber, where it comes into contact with the coffee grounds. The brewed coffee is then collected in the upper chamber, ready to be served.
The siphon brewing process is often considered to be a more complex and time-consuming method of brewing coffee, but it can produce a very clean, clear, and nuanced cup of coffee. Siphon brewers typically consist of a bottom chamber, a top chamber, a glass or metal tube connecting the two chambers, a filter, and a heat source (usually a burner). To use a siphon brewer, you will need to heat the water in the bottom chamber until it boils, and then carefully observe the brewing process as the hot water is forced upwards through the coffee grounds and into the top chamber.

#7. Cold brew
Cold brew coffee is a method of brewing coffee that involves steeping ground coffee beans in cold water for an extended period of time, typically 12-24 hours. This method of brewing results in a coffee that is smooth, sweet, and low in acidity, as the extended steeping time allows the flavors of the coffee beans to be extracted slowly and gently.
To make cold-brew coffee, you will need the following items:
- Coarsely ground coffee beans
- Filtered water
- A large container (such as a jar or pitcher)
- A strainer or coffee filter
Here is a basic recipe for making cold-brew coffee:
- In a large container, combine 1 cup of coarsely ground coffee beans with 4 cups of cold, filtered water.
- Stir the mixture gently to ensure that the coffee grounds are fully saturated with water.
- Cover the container and place it in the refrigerator for 12-24 hours, depending on your desired strength.
- After the steeping time has elapsed, strain the coffee through a fine-mesh strainer or coffee filter to remove the grounds.
- Serve the cold brew coffee over ice, or refrigerate it until ready to serve. You can also dilute the cold brew with water or milk if desired.
Cold brew coffee is a refreshing and tasty alternative to traditional hot-brewed coffee, and it is especially popular during the warmer months.

#8. Turkish coffee
Turkish coffee is a traditional method of brewing coffee that is popular in the Middle East and parts of Eastern Europe. It involves brewing a very strong, finely ground coffee with water and sugar (if desired) in a small pot called a cezve. The coffee is served in small cups, and it is traditionally enjoyed with sweet pastries or desserts.
To make Turkish coffee, you will need the following items:
- Very finely ground coffee beans
- Water
- Sugar (optional)
- A cezve or small pot
- A heat source (such as a stove)
Here is a basic recipe for making Turkish coffee:
- Place the cezve on the stove over medium heat, and add the desired amount of water. The water should be enough to fill the cups you will be serving the coffee in, plus a little extra.
- Add the desired amount of sugar to the water, if using. Stir the mixture gently to dissolve the sugar.
- Add the finely ground coffee to the cezve, stirring gently to combine.
- Bring the mixture to a boil, and then reduce the heat to the lowest setting. Allow the coffee to simmer for a few minutes until it forms a thick foam on top.
- Remove the cezve from the heat and carefully pour the coffee into small cups. Be sure to pour the foam evenly among the cups.
- Serve the Turkish coffee immediately, along with a small glass of cold water on the side. Enjoy!
Turkish coffee is a strong, flavorful, and aromatic coffee that is an integral part of the culture and cuisine of many countries in the Middle East and Eastern Europe. It is traditionally served at the end of a meal or with sweets, and it is meant to be savored slowly and enjoyed with friends.

#9. Vacuum pot
A vacuum pot, also known as a siphon brewer, is a type of coffee brewing device that uses vapor pressure to force hot water through a bed of ground coffee and produce brewed coffee. The vacuum pot consists of two chambers that are connected by a tube. The bottom chamber is filled with water, and the top chamber holds the ground coffee. When the bottom chamber is heated, the water boils and produces steam, which creates a vapor pressure that forces the hot water up through the tube and into the top chamber, where it comes into contact with the ground coffee. The brewed coffee is then collected in the top chamber, ready to be served.
To use a vacuum pot, you will need the following items:
- Freshly roasted, finely ground coffee beans
- Filtered water
- A vacuum pot
- A heat source (such as a stove)
Here are the basic steps for brewing coffee using a vacuum pot:
- Fill the bottom chamber of the vacuum pot with cold, filtered water.
- Place the top chamber of the vacuum pot on top of the bottom chamber, making sure that it is securely in place.
- Fill the top chamber of the vacuum pot with finely ground coffee. Tap the side of the pot gently to settle the grounds, but do not tamp them down.
- Place the vacuum pot on the stove over medium heat, and wait for the water in the bottom chamber to boil and produce steam.
- As the steam pressure builds, it will force the hot water up through the coffee grounds and into the top chamber, where it will be collected and ready to be served.
- As soon as the top chamber is full of coffee, turn off the heat and carefully remove the vacuum pot from the stove.
- Pour the brewed coffee into your mug or cups, and enjoy!
Vacuum pot brewing is a unique and enjoyable way to brew coffee, and it can produce a clean, clear, and nuanced cup of coffee. However, it is a more complex and time-consuming method of brewing than some other methods, so it may not be suitable for everyone.

#10. Espresso
Espresso is a type of coffee that is brewed by forcing hot water under high pressure through finely-ground coffee beans. The result is a strong, concentrated coffee with a rich flavor and a thick, creamy layer of foam on top, known as crema. Espresso is often served in small, 1-2 oz servings, and it is the foundation for many other coffee-based drinks, such as lattes, cappuccinos, and Americanos.
To make espresso, you will need the following items:
- Freshly roasted, finely ground coffee beans
- An espresso machine
Here are the basic steps for brewing espresso using an espresso machine:
- Fill the water tank of the espresso machine with cold, filtered water.
- Turn on the machine and allow it to warm up for a few minutes.
- Grind the coffee beans to a very fine consistency, using a burr grinder.
- Place the ground coffee in the basket of the machine’s portafilter, and tamp it down firmly with a tamper.
- Place the portafilter in the machine and lock it into place.
- Place a mug or cup under the portafilter, and press the “espresso” button on the machine.
- The machine will begin to extract the espresso, and the brewed coffee will be dispensed into the mug or cup. The extraction process should take about 25-30 seconds.
- Once the desired amount of espresso has been extracted, stop the machine and remove the portafilter.
- Serve the espresso immediately, or use it as the base for other coffee-based drinks.
Espresso is a popular and classic coffee beverage that is enjoyed by people all over the world. It is a versatile drink that can be enjoyed on its own or used as the base for a wide variety of coffee-based drinks.
#11. Boiled coffee
Boiled coffee is a type of coffee that is made by boiling ground coffee beans in water. This method is simple and easy, but it can produce a strong, bitter-tasting coffee that is not as smooth as coffee brewed using other methods. To make boiled coffee, you will need ground coffee beans, water, and a pot or a pan. Simply bring the water to a boil, add the ground coffee beans, and let the mixture simmer for a few minutes. Then, strain the coffee and serve it hot. Boiled coffee is a traditional method of making coffee in some parts of the world, particularly in Eastern and Northern Europe. It is also sometimes used as a base for other coffee drinks, such as Irish coffee.
To make boiled coffee, you will need ground coffee beans, water, and a pot or a pan. Here is a simple recipe for making boiled coffee:
Ingredients:
- 2 cups of water
- 2 tablespoons of ground coffee beans
Instructions:
- Bring the water to a boil in a pot or a pan.
- Add the ground coffee beans to the water and stir.
- Let the mixture simmer for 3-5 minutes.
- Strain the coffee through a fine mesh sieve or a coffee filter to remove the grounds.
- Serve the coffee hot.
Boiled coffee is a traditional method of making coffee in some parts of the world, particularly in Eastern and Northern Europe. It is also sometimes used as a base for other coffee drinks, such as Irish coffee. However, it is not as popular as other brewing methods, such as drip brewing or espresso, because it can produce a strong, bitter-tasting coffee that is not as smooth as coffee brewed using other methods.
#12. Sous vide
Sous vide is not a traditional coffee brewing method, but it can be used to enhance the flavor of the coffee. One way to use sous vide in coffee brewing is to pre-infuse coffee grounds with water at a precise temperature using sous vide machine. This can help to extract more flavor from the beans and create a more balanced, complex cup of coffee. To use sous vide in coffee brewing, you will need sous to vide machine, a plastic bag or jar, ground coffee, and water. Here is a basic recipe for sous vide coffee:
Ingredients:
- 1 cup of ground coffee beans
- 4 cups of water
Instructions:
- Preheat your sous vide machine to 185°F (85°C).
- Place the ground coffee beans in a plastic bag or jar.
- Add the water to the bag or jar and seal it tightly.
- Place the bag or jar in the water bath and cook for 1 hour.
- Remove the bag or jar from the water bath and let it cool.
- Once the coffee has cooled, strain it to remove the grounds.
- Serve the coffee hot or chilled, as desired.
Sous vide coffee can have a more intense, complex flavor than coffee brewed using other methods. It is a unique and innovative way to brew coffee, and it can be a fun experiment for coffee enthusiasts who want to try something new.
#13. Stovetop espresso maker
A stovetop espresso maker, also known as a Moka pot, is a type of coffee brewer that is commonly used in Europe and Latin America. It is a simple and efficient way to brew a strong, flavorful coffee that is similar to espresso. The Moka pot consists of three main parts: a base, a filter basket, and a top chamber. The base is filled with water, the filter basket is filled with ground coffee, and the top chamber is where the brewed coffee collects. To use a Moka pot, you simply place it on the stove over medium heat and wait for the water to boil and produce steam. As the steam pressure builds, it forces the hot water up through the ground coffee and into the top chamber, where it is collected and ready to be served.
To brew coffee using a stovetop espresso maker, you will need the following items:
- Freshly roasted, finely ground coffee beans
- Filtered water
- A stovetop espresso maker
- A stove or heat source
Here are the basic steps for brewing coffee using a stovetop espresso maker:
- Fill the base of the Moka pot with cold, filtered water. Be sure not to overfill the base, as the water should not come into contact with the bottom of the filter basket.
- Place the filter basket on top of the base, and fill it with finely ground coffee. Tap the side of the Moka pot gently to settle the grounds, but do not tamp them down.
- Place the top chamber of the Moka pot on top of the filter basket, making sure that it is securely in place.
- Place the Moka pot on the stove over medium heat. As the water in the base begins to boil and produce steam, the steam pressure will force the hot water up through the coffee grounds and into the top chamber.
- As the coffee begins to fill the top chamber, it will start to sputter and make a hissing sound. This is normal, and it means that the coffee is almost ready.
- As soon as the top chamber is full of coffee, turn off the heat and carefully remove the Moka pot from the stove. The brewed coffee will be ready to serve.

#14. Cowboy coffee
Cowboy coffee is a traditional method of making coffee over an open fire or on a stovetop. It is a simple and straightforward method that does not require any specialized equipment, and it is often used in outdoor settings or when a coffee maker is not available.
To make cowboy coffee, you will need coarsely ground coffee beans, water, and a pot or a pan with a handle.
Here is a basic recipe for making cowboy coffee:
Ingredients:
- 1 cup water
- 2 tablespoons coarsely ground coffee beans
Instructions:
- Bring the water to a boil in the pot or pan.
- Add the ground coffee beans to the boiling water.
- Remove the pot or pan from the heat and let it sit for about 4-5 minutes to allow the coffee to brew.
- After the desired brewing time has passed, use a spoon to gently stir the coffee to help the grounds settle to the bottom of the pot or pan.
- Pour the coffee into mugs or cups, being careful to avoid pouring the grounds that have settled at the bottom of the pot or pan.
Note: Some people prefer to add a pinch of salt to the coffee grounds before brewing, as this is said to help reduce the bitterness of the coffee. You can also adjust the strength of the coffee by using more or fewer coffee beans, or by brewing for a shorter or longer period of time.
#15. Coffee bags
Coffee bags are a convenient and easy way to brew coffee, similar to how tea bags are used to brew tea. They are typically made of paper or a biodegradable material and are filled with ground coffee beans. To use a coffee bag, you simply place it in a mug or cup and add hot water, just like you would with a tea bag. The coffee will then brew in the hot water, infusing it with flavor. Some coffee bags are designed to be placed directly in a mug or cup, while others are designed to be hung over the side of the mug or cup using a string.
Coffee bags can be a good option for people who want a quick and easy way to brew a single serving of coffee without having to use a coffee maker or other brewing equipment. They are also convenient for people who are traveling or do not have access to a coffee maker. Some coffee bags are also available in a variety of flavors and roasts, so you can choose the one that best suits your taste preferences.
#16. Instant coffee
Instant coffee, also known as soluble coffee, all type of Instant coffee is a type of coffee that is made by dehydrating brewed coffee. It can be made by freeze-drying or spray-drying the coffee. To prepare instant coffee, you just need to add hot water to the coffee granules and stir. The hot water will dissolve the coffee granules, creating a cup of coffee.
To make instant coffee, you will need a cup or mug, a spoon, hot water, and instant coffee granules. Here is the basic method for making instant coffee:
- Boil water: Fill a kettle with water and bring it to a boil. Alternatively, you can use a microwave or a stovetop pot to heat water.
- Place a spoonful of instant coffee granules in your cup or mug: How much you use will depend on how strong you like your coffee. A general guideline is to use about one teaspoon of instant coffee per six ounces of water.
- Pour hot water over the instant coffee: Pour the hot water over the instant coffee granules in your cup or mug.
- Stir: Use the spoon to stir the hot water and instant coffee together until the granules are fully dissolved.
- Add milk and sugar, if desired: If you like your coffee with milk and sugar, add them to the cup or mug now. Stir to combine.
- Enjoy: Your instant coffee is now ready to drink. You can drink it as is, or add ice if you prefer iced coffee.

#17. Percolator
A percolator is a type of coffee maker that uses a process of continuous brewing to make coffee. It consists of a pot with a chamber at the bottom for holding the ground coffee, and a tube that runs from the bottom of the chamber up to the top of the pot. Hot water is forced up the tube and over the ground coffee, and the brewed coffee drips back down into the pot.
There are two main types of percolators: electric and stovetop. An electric percolator is designed to be plugged into an electrical outlet, while a stovetop percolator is designed to be used on a stovetop burner.
To use a percolator, you will need ground coffee, water, and either an electrical outlet or a stovetop burner. Here is the basic method for making coffee using a percolator:
- Fill the percolator with water: Fill the water chamber of the percolator with cold water.
- Add ground coffee: Place a filter in the basket at the top of the percolator, and add the desired amount of ground coffee to the basket.
- Brew the coffee: If you are using an electric percolator, plug it in and turn it on. If you are using a stovetop percolator, place it on a burner and turn on the heat. The percolator will make a gurgling sound as the hot water is forced up the tube and over the ground coffee. When the coffee is finished brewing, the percolator will automatically turn off (electric percolator) or you will need to remove it from the heat (stovetop percolator).
- Serve the coffee: Carefully pour the brewed coffee into mugs or a coffee pot. Be sure to use a potholder or oven mitt, as the percolator and the coffee will be hot.
#18. Auto-drip coffee maker
An auto-drip coffee maker, also known as a drip coffee maker, is a type of coffee machine that brews coffee by heating water and dripping it over ground coffee beans. It is a popular choice for home brewing because it is easy to use and produces a consistent cup of coffee.
To use an auto-drip coffee maker, you will need ground coffee, water, and a power outlet. Here is the basic method for making coffee using an auto-drip coffee maker:
- Fill the water reservoir: Open the lid of the coffee maker and fill the water reservoir with cold water. The amount of water you use will depend on the size of the reservoir and the strength of the coffee you prefer. As a general rule, use about 6 ounces of water for every 2 tablespoons of ground coffee.
- Add ground coffee: Open the basket or filter holder and add the desired amount of ground coffee to the filter. A general guideline is to use about 2 tablespoons of ground coffee for every 6 ounces of water.
- Place the filter holder back in the coffee maker: Close the lid of the filter holder and place it back in the coffee maker.
- Turn on the coffee maker: Press the “On” button to start the brewing process. The coffee maker will begin to heat the water and drip it over the ground coffee.
- Wait for the coffee to brew: The coffee maker will take about 5-10 minutes to brew a full pot of coffee, depending on the size of the pot and the strength of the coffee.
- Serve the coffee: When the brewing is finished, the coffee maker will turn off automatically. Carefully pour the brewed coffee into mugs or a coffee pot. Be sure to use a potholder or oven mitt, as the coffee pot will be hot.
#19. Clever Dripper
The Clever Dripper is a type of manual coffee brewing device that combines elements of both drip brewing and immersion brewing. It is a cone-shaped brewer made of plastic or ceramic, with a flat bottom and a valve at the bottom.
To use a Clever Dripper, you will need ground coffee, water, and a heat source (such as a stovetop burner). Here is the basic method for making coffee using a Clever Dripper:
- Heat water: Fill a kettle or a pot with water and bring it to a boil. Alternatively, you can use a microwave or a stovetop pot to heat water.
- Add ground coffee to the Clever Dripper: Place the Clever Dripper on a mug or a carafe and add the desired amount of ground coffee to the brewer. A general guideline is to use about 15-18 grams of coffee for every 8 ounces of water.
- Pour hot water over the ground coffee: Once the water is heated, pour it over the ground coffee in the Clever Dripper. The water should be about 195-205°F (90-96°C).
- Wait for the coffee to brew: The coffee will brew for about 3-4 minutes, depending on the strength of the coffee you prefer.
- Serve the coffee: Once the brewing is finished, the valve at the bottom of the Clever Dripper will open and the brewed coffee will flow into the mug or carafe. Serve the coffee immediately, or transfer it to a thermal carafe to keep it warm.
#20. K-cups/single-serve coffee pod
Single-serve pod coffee makers are a convenient and easy way to make a single cup of coffee. These machines use pre-packaged coffee pods, which contain a measured amount of ground coffee and are designed to be used with a single-serve coffee maker. To use a single-serve pod coffee maker, you will need a coffee pod and water.
K-cups are a type of single-serve coffee pod that is designed to be used with a Keurig brand coffee maker. K-cups are made of plastic and contain a measured amount of ground coffee, as well as a filter to hold the coffee and prevent it from coming into contact with the water during brewing. To use a K-cup for espresso, you will need a Keurig coffee maker and an espresso K-cup.
Here is the basic method for making coffee using a K-cup and a Keurig coffee maker:
- Fill the water reservoir: Open the lid of the coffee maker and fill the water reservoir with cold water. The amount of water you use will depend on the size of the reservoir and the strength of the coffee you prefer.
- Insert the K-cup: Open the pod holder and place a K-cup in it. Close the holder.
- Choose the size of the cup: Some Keurig coffee makers have a button or dial that allows you to select the size of the cup you want to brew. Choose the appropriate size for your mug or cup.
- Turn on the coffee maker: Press the “On” button to start the brewing process. The coffee maker will begin to heat the water and drip it over the K-cup.
- Wait for the coffee to brew: The coffee maker will take about 1-2 minutes to brew a single cup of coffee, depending on the size of the cup and the strength of the coffee.
- Serve the coffee: When the brewing is finished, the coffee maker will turn off automatically. Carefully remove the K-cup from the holder and dispose of it. Pour the brewed coffee into a mug and enjoy.
#21. Nitrous coffee
Nitro coffee is a type of cold brew coffee that is infused with nitrogen gas. It is served chilled and has a creamy, smooth texture and a rich, full flavor. Nitro coffee is often served on tap, like draft beer, and is dispensed through a special keg system that adds nitrogen gas to the coffee as it is poured.
There are a few different methods for brewing nitro coffee, but the basic process involves steeping coarsely ground coffee beans in cold water for an extended period of time (usually 12-24 hours). The resulting coffee concentrate is then chilled and transferred to a keg, where it is infused with nitrogen gas. The keg is then connected to a tap and chilled until it is ready to be served.
To serve nitro coffee, you will need a special tap system and a serving glass. The tap system uses a pressurized gas blend (usually a combination of nitrogen and carbon dioxide) to force the coffee out of the keg and into the glass. When the coffee is poured, the nitrogen creates a creamy, smooth texture and a frothy head, similar to the head on a glass of draft beer. The coffee is served chilled and is typically enjoyed black, although some people may add milk or sweeteners if desired.
#22. Vietnamese Phin
The Vietnamese Phin brewing method is a traditional method of making Vietnamese coffee. It involves using a small metal filter called a Phin to slowly drip hot water over finely ground coffee beans, resulting in a strong and flavorful cup of coffee. Here is a general overview of the steps involved in the Vietnamese Phin brewing method:
- Start by heating water in a kettle or on the stove until it reaches a temperature of around 190-200 degrees Fahrenheit.
- While the water is heating up, place the Phin on top of a mug or small coffee cup.
- Add finely-ground coffee beans to the Phin, filling it about three-quarters full. Tap the Phin gently to level out the grounds and tamp them down lightly with the tamper that usually comes with the Phin.
- Place a small piece of cloth or a coffee filter on top of the grounds to help keep them in place and prevent any grounds from escaping into the cup.
- Once the water has heated up, slowly pour it over the grounds in the Phin, using a circular motion to ensure that all of the grounds are evenly saturated.
- Allow the water to drip through the Phin and into the cup below. This process should take about 3-5 minutes.
- Once all of the water has dripped through the Phin, remove it from the cup and discard the grounds.
- Add sweetened condensed milk to the coffee, if desired, and stir to combine.
- Enjoy your freshly brewed Vietnamese coffee!
#23. Café con Leche
Café con Leche is a popular coffee drink in Puerto Rico and other parts of Latin America. It is made with strong, dark-roasted coffee and steamed milk, and is often served with a sprinkle of cinnamon on top. Here is a general overview of the steps involved in brewing café con Leche using the traditional Puerto Rican method:
- Begin by brewing a strong pot of coffee using your preferred method. Puerto Rican coffee is typically made with a dark roast, finely ground coffee bean, and brewed using a stovetop espresso pot or a traditional coffee pot.
- While the coffee is brewing, heat up some milk in a separate pot or in a microwave-safe container. You can use whole milk, 2% milk, or even non-dairy milk, depending on your preference.
- Once the milk is hot and steamed (but not boiling), add it to a mug or coffee cup.
- Pour the brewed coffee into the mug or cup over the hot milk, stirring to combine.
- If desired, add a sprinkle of cinnamon on top and stir it into the coffee.
- Enjoy your café con leche hot! You can also serve it over ice if you prefer a cold coffee drink.
#24. Pour Over Cone
The pour-over method is a manual brewing method that involves pouring hot water over ground coffee in a filter cone. It’s a simple and efficient way to make a single cup of coffee and it allows you to control all aspects of the brewing process. Here’s a general outline of the pour-over method:
- Boil water: Heat water to around 200°F.
- Grind beans: Grind your beans to a medium-fine consistency.
- Place filter: Place a paper filter in the cone and rinse it with hot water to remove any papery taste.
- Add coffee: Add the ground coffee to the filter.
- Pour water: Slowly pour the hot water over the coffee, starting in the center and working your way outward in a circular motion.
- Wait: Let the coffee brew for a few minutes, until all of the water has passed through the grounds.
- Remove filter: Discard the filter and grounds, and pour the brewed coffee into your cup.
#25. Manual espresso machine
A manual espresso machine is a type of coffee brewing device that uses manual force to create and dispense espresso. They typically have a lever or handle that the user operates to manually apply pressure to the coffee grounds, forcing hot water through them and creating espresso.
Manual espresso machines can be a good choice for people who want to have more control over their espresso brewing process and appreciate the hands-on aspect of using a lever to extract the coffee. They are generally less expensive than fully automatic espresso machines and can be a good option for people who want to learn more about the process of making espresso.
To use a manual espresso machine, you will need to grind your coffee beans to a fine consistency, tamp the ground coffee into the portafilter, and attach the portafilter to the machine. Then, you will need to heat up the machine and pull the lever to apply pressure to the coffee grounds, and extract the espresso. Some manual machines may have additional features such as a steam wand for frothing milk.
#26. bean-to-cup coffee machine
A bean-to-cup coffee machine is a type of coffee brewing appliance that grinds whole coffee beans and brews them to make coffee. These machines typically have a built-in grinder and can make a variety of coffee drinks, including espresso, lattes, and cappuccinos.
To use a bean-to-cup coffee machine, you simply add whole coffee beans to the machine’s hopper and select the type of coffee you want to brew. The machine will then grind the beans and dispense them into the brewing chamber, where hot water is passed through the grounds to extract the coffee. Some bean-to-cup machines also have a steam wand or frother for frothing milk.
Bean-to-cup coffee machines can be a convenient choice for people who want to have the option to grind their own beans and make a variety of coffee drinks at home. However, they can be more expensive than other types of coffee brewing appliances and may require more maintenance, such as cleaning and descaling.
#27. Capsule coffee machine
Capsule coffee brewing refers to a method of making coffee using pre-packaged coffee pods or capsules that are designed to be used with a specific type of coffee machine. The pods or capsules contain a measured amount of ground coffee and are sealed to keep the coffee fresh. To brew coffee using a capsule machine, you simply insert a capsule into the machine and press a button to start the brewing process.
The hot water is forced through the capsule, extracting the coffee as it passes through. Capsule coffee brewing is a convenient and quick way to make coffee, as the capsules are easy to use and there is no need to measure out coffee grounds or clean a filter. However, the capsules can be more expensive than buying ground coffee and brewing it using a traditional method.
#28. Lever espresso machine
A lever espresso machine is a type of manual espresso machine that uses a lever to apply pressure to the coffee grounds and extract the espresso. Lever espresso machines are often considered to be more traditional and traditionalist than other types of espresso machines, as they were the first type of espresso machine to be invented.
To use a lever espresso machine, you will need to grind your coffee beans to a fine consistency, tamp the ground coffee into the portafilter, and attach the portafilter to the machine. Then, you will need to heat up the machine and pull the lever to apply pressure to the coffee grounds and extract the espresso. Lever espresso machines may have additional features such as a steam wand for frothing milk.
Lever espresso machines can be a good choice for people who want to have more control over their espresso brewing process and appreciate the hands-on aspect of using a lever to extract the coffee. They are generally less expensive than fully automatic espresso machines and can be a good option for people who want to learn more about the process of making espresso.
#29. Hario V60 Dripper
The Hario V60 Dripper is a popular manual brewing method that is known for producing a clean and flavorful cup of coffee. It is a cone-shaped, ceramic, or plastic dripper with a large hole at the bottom, and it is used in conjunction with filter paper cones and a mug or carafe to hold the brewed coffee. Here is a general overview of the steps involved in using the Hario V60 Dripper to brew coffee:
- Start by heating up some water in a kettle or on the stove until it reaches a temperature of around 190-200 degrees Fahrenheit.
- While the water is heating up, place a filter paper cone in the Hario V60 Dripper and place it on top of a mug or carafe.
- Add finely-ground coffee beans to the filter paper, filling it about three-quarters full. Tap the dripper gently to level out the grounds and tamp them down lightly with a tamper, if desired.
- Once the water has heated up, wet the coffee grounds with a small amount of hot water to “bloom” them. This helps to release gases from the coffee and improve the overall flavor of the brew.
- Slowly pour the rest of the hot water over the coffee grounds in a circular motion, making sure to cover all of the grounds evenly.
- Allow the water to drip through the filter paper and into the mug or carafe below. This process should take about 2-3 minutes.
- Once all of the water has dripped through the filter paper, discard the grounds and enjoy your freshly brewed coffee!
Note: The specifics of the brewing process may vary depending on the specific Hario V60 Dripper model you are using and the type of coffee beans and water you are using. You may need to experiment with the grind size, water temperature, and brewing time to find the perfect combination for your taste preferences.
#30. Kalita Wave
The Kalita Wave is a manual coffee brewing method that uses a cone-shaped dripper and flat-bottomed filter to brew coffee. The Kalita Wave is known for its consistent and balanced brews, and it is a popular choice among coffee enthusiasts and baristas.
To use the Kalita Wave, you will need a Kalita Wave dripper, filter papers, freshly ground coffee, and hot water. Here is a general guide on how to brew coffee using the Kalita Wave method:
- Begin by heating water to the appropriate temperature for your coffee (around 200 degrees Fahrenheit).
- Place a Kalita Wave filter paper in the dripper, and rinse it with hot water to remove any papery taste.
- Add your freshly ground coffee to the filter.
- Slowly pour hot water over the coffee, starting from the center and working your way outwards in a circular motion. Be sure to wet all of the grounds evenly.
- Once the water has drained through the coffee, add more hot water in the same way. Repeat this process until you have brewed the desired amount of coffee.
- Discard the filter and enjoy your coffee!
The Kalita Wave method is known for producing a clean, balanced, and consistent cup of coffee. It is a relatively easy brewing method to learn, and it is a great way to get started with manual brewing.
#31. Hario V60
The Hario V60 is a popular method of manual pour-over coffee brewing. To brew coffee using a Hario V60, you will need the following items:
- Hario V60 pour-over cone
- Hario V60 filter papers
- Ground coffee
- Water
- Heat source
- Gooseneck kettle (optional)
To brew coffee using a Hario V60:
- Boil water in a kettle or on the stove.
- Place the Hario V60 cone on top of a mug or carafe.
- Insert filter paper into the cone and rinse it with hot water to remove any papery taste.
- Grind your coffee beans to a medium-fine consistency and add them to the filter paper.
- Slowly pour a small amount of hot water over the grounds in a circular motion, wetting all of the coffee. This is called the “bloom.”
- Wait 30 seconds for the coffee to “bloom,” or release gases.
- Slowly pour the rest of the hot water over the coffee, continuing in a circular motion.
- Once all of the water has been added, remove the cone and dispose of the filter paper.
- Pour the brewed coffee into your mug and enjoy!
#32. iced coffee pitcher method
The iced coffee pitcher method is a method for making a large batch of iced coffee. Here’s one way to do it:
- Start with a clean, empty pitcher.
- Grind your coffee beans and add them to the pitcher. You’ll need about 1 cup of coffee grounds for every 4 cups of water.
- Pour cold water over the grounds and stir to combine.
- Cover the pitcher and place it in the fridge for at least 12 hours, or overnight.
- After the coffee has been brewed in the fridge, strain the grounds from the liquid using a fine mesh strainer or cheesecloth.
- Pour the iced coffee over the ice and serve. You can add milk, cream, sweetener, or any other desired additives at this point.
This method allows you to make a large batch of iced coffee in advance, so it’s convenient for serving a group or for having iced coffee ready in the fridge when you want it.
#33. Wilfa Precision Automatic Brewer
Wilfa Precision Automatic Brewer is a coffee maker designed for use at home or in a small office setting. It is an automatic drip coffee maker that utilizes precision brewing technology to produce high-quality, consistent coffee. The Wilfa Precision Automatic Brewer has a temperature control feature that allows you to set the temperature of the water used to brew your coffee, as well as a timer function that allows you to set the brewing time. It also has a built-in scale that measures the weight of the coffee beans and water, ensuring a consistent brew every time. The Wilfa Precision Automatic Brewer is a convenient and easy-to-use coffee maker that is suitable for coffee lovers who want to brew their own coffee at home or in a small office setting.
#34. Yama Glass Tower Cold Drip
Yama Glass Tower Cold Drip is a type of coffee brewing equipment that is used to make cold brew coffee. It consists of a tall, glass tower with a series of chambers and tubes. Water is placed in the top chamber and allowed to drip slowly through the coffee grounds, which are placed in a filter in the middle chamber. As the water passes through the grounds, it extracts the flavors and oils from the coffee beans. The resulting cold brew coffee drips into the bottom chamber, where it can be collected and served.
The Yama Glass Tower Cold Drip is known for its elegant design and ability to produce a smooth, balanced cold brew coffee with lower acidity than traditional hot-brewed coffee. It is a popular choice among coffee enthusiasts and can be found in many specialty coffee shops.
#35. Bunn Trifecta
The Bunn Trifecta is a type of coffee brewing machine that is known for its ability to produce high-quality coffee drinks quickly and consistently. It is a multi-functional machine that can be used to brew a variety of coffee-based drinks. The Trifecta is designed to be easy to use and to produce consistent results, making it a popular choice for coffee shops, cafes, and other commercial settings. It is also available for home use.
The Bunn Trifecta uses a combination of air pressure and water flow to extract the flavors and aromas of coffee beans. It has a built-in grinder and a pressure gauge that allows you to adjust the strength and flavor of the coffee being brewed. To use the Trifecta, you will need to add ground coffee to the machine and adjust the settings to your desired brew strength and flavor profile. You can then choose from a variety of coffee drinks to brew, including espresso, Americano, cappuccino, and latte. Once you have made your selection, the Trifecta will grind the beans and brew the coffee using a combination of air pressure and water flow. The finished product should be a high-quality, consistent cup of coffee.
#36. Toddy Cold Brew System
The Toddy Cold Brew System is a device that is used to make cold-brew coffee. It consists of a cylindrical container with a spout and a plug at the bottom, a rubber stopper, and a cylindrical filter. To use the Toddy Cold Brew System, you simply add coarsely ground coffee to the container, pour cold water over the coffee, and let it steep for 12-24 hours. The coffee is then brewed through the filter and into a separate container, leaving behind the coffee grounds. The resulting cold brew coffee is smooth and less acidic than coffee brewed with hot water.
Here is a basic recipe for making cold-brew coffee using the Toddy Cold Brew System:
- Coarsely grind about 1 cup of coffee beans and add them to the Toddy container.
- Slowly pour 4 cups of cold water over the coffee beans, making sure to wet all of the grounds.
- Cover the Toddy container and let it sit at room temperature for 12-24 hours.
- After the desired steeping time has passed, place the Toddy over a pitcher or other container.
- Lift the plug at the bottom of the Toddy to allow the brewed coffee to flow out of the spout and into the container.
- When all of the brewed coffee has been collected, dispose of the coffee grounds and rinse the Toddy.
- Store the brewed coffee in the refrigerator until ready to serve.
To serve, dilute the cold brew concentrate with water or milk to taste. You can also add sweeteners or flavorings as desired. Enjoy!
#37. Filtron Cold Water Coffee Concentrate Brewer
The Filtron Cold Water Coffee Concentrate Brewer is a coffee brewing device that allows you to make cold-brew coffee at home. It is a simple and easy-to-use system that consists of a base, a filter bag, and a brewing container. To use the Filtron Cold Water Coffee Concentrate Brewer, you will need to add coarsely ground coffee to the filter bag and place it in the brewing container. Then, add cold water to the container and let the coffee brew for about 12-18 hours. Once the coffee has been brewed, you can remove the filter bag and discard the grounds. The resulting coffee concentrate can be stored in the refrigerator and mixed with water or milk to make cold-brew coffee.
Conclusion
In conclusion, the world of coffee brewing methods is vast and diverse, offering a multitude of options to suit every coffee lover’s preferences. Each brewing method brings its own unique characteristics, flavors, and brewing techniques to the table.
Whether you prefer the clean and crisp flavors of pour-over, the robust richness of French press, the convenience of the AeroPress, or the concentrated intensity of espresso, there is a brewing method that will cater to your taste buds. Additionally, options like the Chemex, cold brew, and other specialized methods provide even more variety and experimentation opportunities.
The key to finding your perfect cup of coffee lies in exploring different brewing methods, experimenting with variables like grind size, water temperature, and brewing time, and discovering the flavors that resonate with you the most. It’s an exciting journey of trial and error, but one that ultimately leads to a cup of coffee that satisfies and delights.
Remember, there is no definitive “best” brewing method—what matters most is finding the method that aligns with your preferences and allows you to brew a cup of coffee that brings you joy. So, whether you’re a purist seeking simplicity or an adventurous home barista eager to explore new techniques, embrace the art and science of coffee brewing and savor the experience of creating your perfect cup of coffee.
Read More:
Contents
- Type of Brewing Methods
- Top 37 Best Coffee Brewing Methods
- #1. French Press Brewing
- #2. Chemex Brewing
- #3. Pour-over
- #4. AeroPress
- #5. Moka pot
- #6. Siphon
- #7. Cold brew
- #8. Turkish coffee
- #9. Vacuum pot
- #10. Espresso
- #11. Boiled coffee
- #12. Sous vide
- #13. Stovetop espresso maker
- #14. Cowboy coffee
- #15. Coffee bags
- #16. Instant coffee
- #17. Percolator
- #18. Auto-drip coffee maker
- #19. Clever Dripper
- #20. K-cups/single-serve coffee pod
- #21. Nitrous coffee
- #22. Vietnamese Phin
- #23. Café con Leche
- #24. Pour Over Cone
- #25. Manual espresso machine
- #26. bean-to-cup coffee machine
- #27. Capsule coffee machine
- #28. Lever espresso machine
- #29. Hario V60 Dripper
- #30. Kalita Wave
- #31. Hario V60
- #32. iced coffee pitcher method
- #33. Wilfa Precision Automatic Brewer
- #34. Yama Glass Tower Cold Drip
- #35. Bunn Trifecta
- #36. Toddy Cold Brew System
- #37. Filtron Cold Water Coffee Concentrate Brewer
- Conclusion